记一次blog重建
部署Vercel失误后的blog重建(基于hexo+NexT8.23.0,采用utterances评论系统和firestore数据记录)
- OK,这是笔者在依赖AI盲目把博客部署到Vercel上导致博客崩溃后的博客重建记录
- 记录的原因首先是更新“记一次blog优化”的内容,还有新版本NexT的一些个人配置(新版本NexT的教程好像不多,评论系统和访客计数系统要自己琢磨好一会儿)
首页分类卡片实现
因为是对“记一次blog优化”的更新,所以这部分直接贴代码了(注:区别更多是在文件名从swig变成了njk)
themes/next/layout/index.njk:
1
2
3
4
5
6
7
8
9
10
11
12
13
14
15
16
17
18
19
20
21
22
23
24
25
26
27
28
29
30
31
32
33
34
35
36
37
38
39
40
41
42
43
44
45
46
47
48
49
50
51
52
53
54
55
56
57
58
59
60
61
62
63
{% extends '_layout.njk' %}
{% import '_macro/sidebar.njk' as sidebar_template with context %}
{% block title %}{{ title }}{%- if theme.index_with_subtitle and subtitle %} - {{ subtitle }}{%- endif %}{% endblock %}
{% block class %}index categories-page{% endblock %}
{% block content %}
{# 这部分是实现category卡片,最后面还有没category的文章的处理,因为我严格了每篇文章有category,就没管画面如何了 #}
{% if site.categories.length > 0 %}
<div class="category-cards-container">
{% for cat in site.categories.toArray() %}
<div class="category-card">
<div class="category-header">
<h2 class="category-name">{{ cat.name }}</h2>
<span class="post-count">{{ cat.posts.length }}篇文章</span>
</a>
</div>
{# 这一部分实现卡片显示包含的文章的标题,数量可以改下面的limit()的数字 #}
<div class="recent-posts-list">
{% for post in cat.posts.sort('date', -1).limit(3).toArray() %}
<div class="recent-post-item">
<a href="{{ url_for(post.path) }}" class="post-title" title="{{ post.title }}">
{{ post.title | truncate(18) }}
</a>
<span class="post-date">
{% if post.updated %}
{{ post.updated.format('MM/DD') }}
{% else %}
{{ post.date.format('MM/DD') }}
{% endif %}
</span>
</div>
{% endfor %}
<div class="more-posts-wrapper">
<a href="{{ url_for('/categories/' + cat.name + '/') }}" class="more-posts-button">
更多文章 →
</a>
</div>
</div>
</div>
{% endfor %}
</div>
{% else %}
<div class="no-categories-notice">
<p>暂无分类数据,请为文章添加分类</p>
</div>
{% endif %}
{% endblock %}
{% block sidebar %}
{{ sidebar_template.render(false) }}
{% endblock %}source/_data/styles.styl:
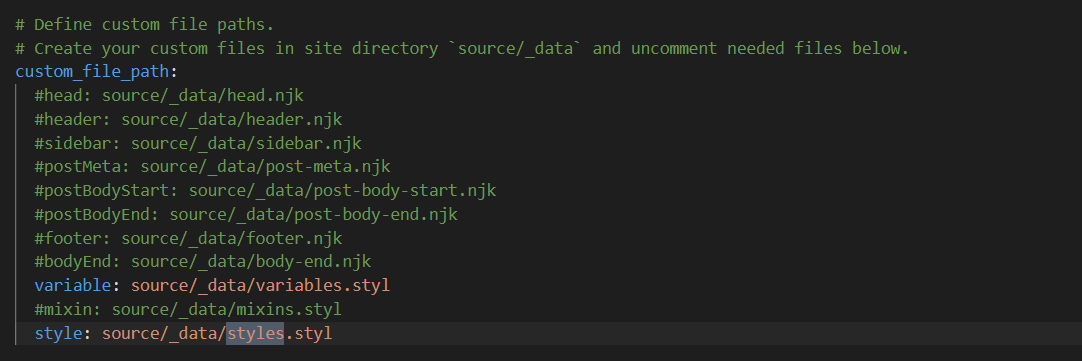
得先在next/config.yml里打开这个文件的支持(可能是新特性吧,笔者记得之前没改过config设置就有这个文件了,但是现在得打开支持并手动创建_data文件夹和styles.styl等文件),在custom_file_path里删除style的注释
1
2
3
4
5
6
7
8
9
10
11
12
13
14
15
16
17
18
19
20
21
22
23
24
25
26
27
28
29
30
31
32
33
34
35
36
37
38
39
40
41
42
43
44
45
46
47
48
49
50
51
52
53
54
55
56
57
58
59
60
61
62
63
64
65
66
67
68
69
70
71
72
73
74
75
76
77
78
79
80
81
82
83
84
85
86
87
88
89
90
91
92
93
94
95
96
97
98
99
100
101
102
103
104
105
106
107
108
109
110
111
112
113
114
115
116
117
118
119
120
121
122
123
124
125
126
127
128
129
130
131
132
133
134
135
136
137
138
139
140
141
142
143
144
145
146
147
148
149
150
151
152
153
154
155
156
157
/* 分类卡片样式 - 安全追加 */
.category-cards-container {
margin: 40px auto;
max-width: 1200px;
padding: 0 20px;
.category-card {
background: rgba(255,255,255,0.85); /* 半透明白色,与你的opacity 0.85协调 */
border-radius: 8px;
box-shadow: 0 2px 15px rgba(0,0,0,0.1);
margin-bottom: 25px;
padding: 25px;
transition: all 0.3s ease;
backdrop-filter: blur(2px); /* 毛玻璃效果增强背景融合 */
border: 1px solid rgba(255,255,255,0.3); /* 柔和边框 */
&:hover {
transform: translateY(-5px);
box-shadow: 0 5px 25px rgba(0,0,0,0.15);
}
.category-name {
color: #2c3e50;
font-size: 1.4em;
margin: 0 0 8px 0;
font-weight: 600;
}
.post-count {
color: #7f8c8d;
font-size: 0.9em;
display: block;
}
}
}
/* 这部分是我自己用的背景图的设置 */
body {
background-image: url(/images/background.jpg);
background-repeat: no-repeat;
background-attachment: fixed;
background-size: 100% 100%;
opacity: 0.85;
}
/* ======================== */
/* 分类卡片内的文章列表样式 */
/* ======================== */
.category-card {
position: relative; /* 为毛玻璃效果提供定位上下文 */
.category-header {
margin-bottom: 15px;
padding-bottom: 12px;
border-bottom: 1px solid rgba(0,0,0,0.08);
}
.recent-posts-list {
margin-top: 10px;
.recent-post-item {
display: flex;
justify-content: space-between;
align-items: center;
padding: 8px 0;
transition: all 0.2s ease;
&:hover {
transform: translateX(3px);
}
.post-title {
color: #34495e;
font-size: 0.95em;
flex-grow: 1;
white-space: nowrap;
overflow: hidden;
text-overflow: ellipsis;
padding-right: 10px;
&:hover {
color: #3498db;
text-decoration: underline;
}
}
.post-date {
color: #95a5a6;
font-size: 0.8em;
font-family: 'Arial', sans-serif;
flex-shrink: 0;
}
}
}
* {
border-bottom: none !important;
box-shadow: none !important;
}
.category-header,
.recent-post-item,
.recent-posts-list {
border: none !important;
border-bottom: none !important;
}
}
/* 更多文章按钮样式 */
.more-posts-wrapper {
text-align: left;
margin-top: 12px;
padding-top: 10px;
.more-posts-button {
display: inline-block;
color:rgb(72, 168, 241);
font-size: 0.9em;
padding: 6px 12px;
border-radius: 4px;
transition: all 0.3s ease;
background: rgba(52, 152, 219, 0.1);
&:hover {
background: rgba(52, 152, 219, 0.2);
transform: translateX(3px);
}
&:hover::after {
margin-left: 8px;
}
}
}
/* 响应式调整 */
@media (max-width: 767px) {
.category-card {
padding: 18px;
.recent-post-item {
flex-direction: column;
align-items: flex-start;
.post-date {
margin-top: 3px;
align-self: flex-end;
}
}
}
}
.posts-container{
margin: 40px auto;
max-width: 1200px;
padding: 0 20px;
}效果请见“记一次blog优化”
点击更多文章后的文章列表实现
仍然是基于原来的Index.njk
themes/next/layout/category.njk:
1
2
3
4
5
6
7
8
9
10
11
12
13
14
15
16
17
18
19
20
21
22
23
24
25
26
27
28
29
30
{% extends '_layout.njk' %}
{% import '_macro/sidebar.njk' as sidebar_template with context %}
{% block title %}
{{ page.category }} | {{ __('title.category') }} | {{ config.title }}
{% if theme.index_with_subtitle and subtitle %} - {{ subtitle }}{% endif %}
{% endblock %}
{% block class %}index posts-expand{% endblock %}
{% block content %}
<div class="category-title" style="text-align: center; margin: 30px 0;">
<h1>{{ page.category }}</h1>
</div>
{# 新增包裹容器并添加间距 class PS:这一部分是个人感觉列表太贴近侧边栏了,所以和首页分类卡片的位置设置保持一致了#}
<div class="posts-container" style="margin-right: 30px ;">
{%- for post in page.posts.toArray() %}
{{ partial('_macro/post.njk', {post: post, is_index: true}) }}
{%- endfor %}
{%- include '_partials/pagination.njk' -%}
{% endblock %}
{% block sidebar %}
{{ sidebar_template.render(false) }}
{% endblock %}效果仍见上一篇博客
删除侧边栏目录下划线与文末标签的“#”
- 这两个部分没有变动,除了文件名的后缀改变了,其余都一样。详见上一篇博客。
utterances评论系统
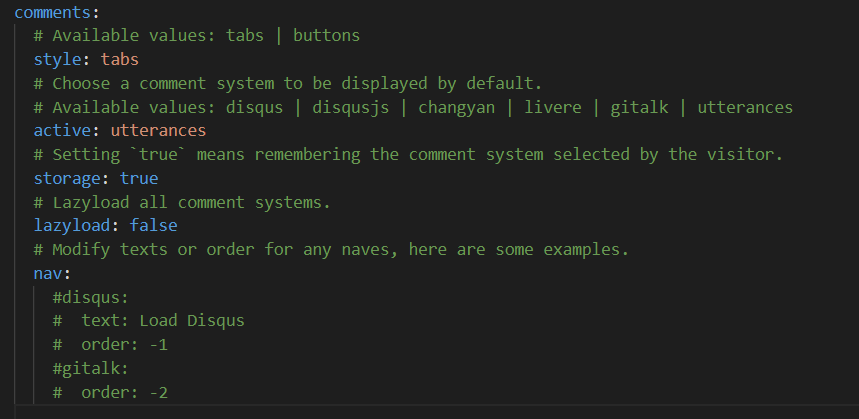
新版本NexT已经不支持valine了,给的选项只有:

所以笔者选了utterances。这个系统好像和github有点关系
在next/config.yml的comments里把active改成utterances
然后需要给github仓库安装utterances,访问https://github.com/apps/utterances ,然后点击Install
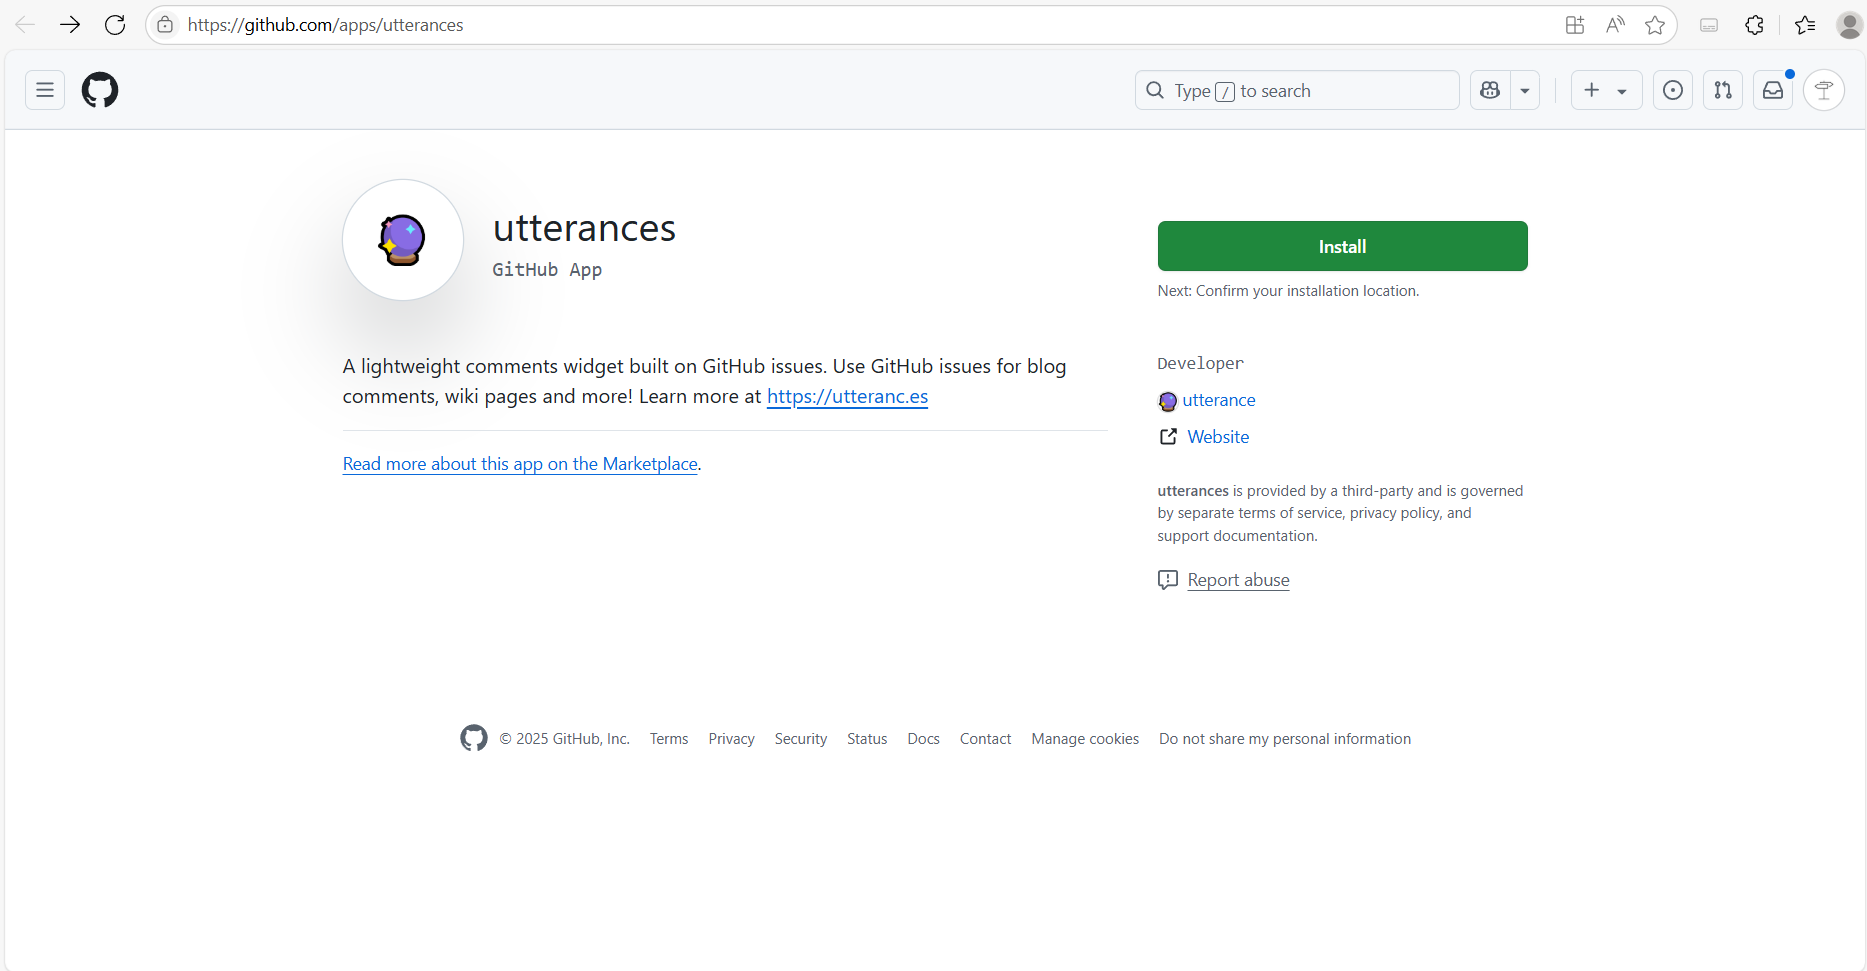
在跳转的页面勾选only select repositories,然后选择博客仓库
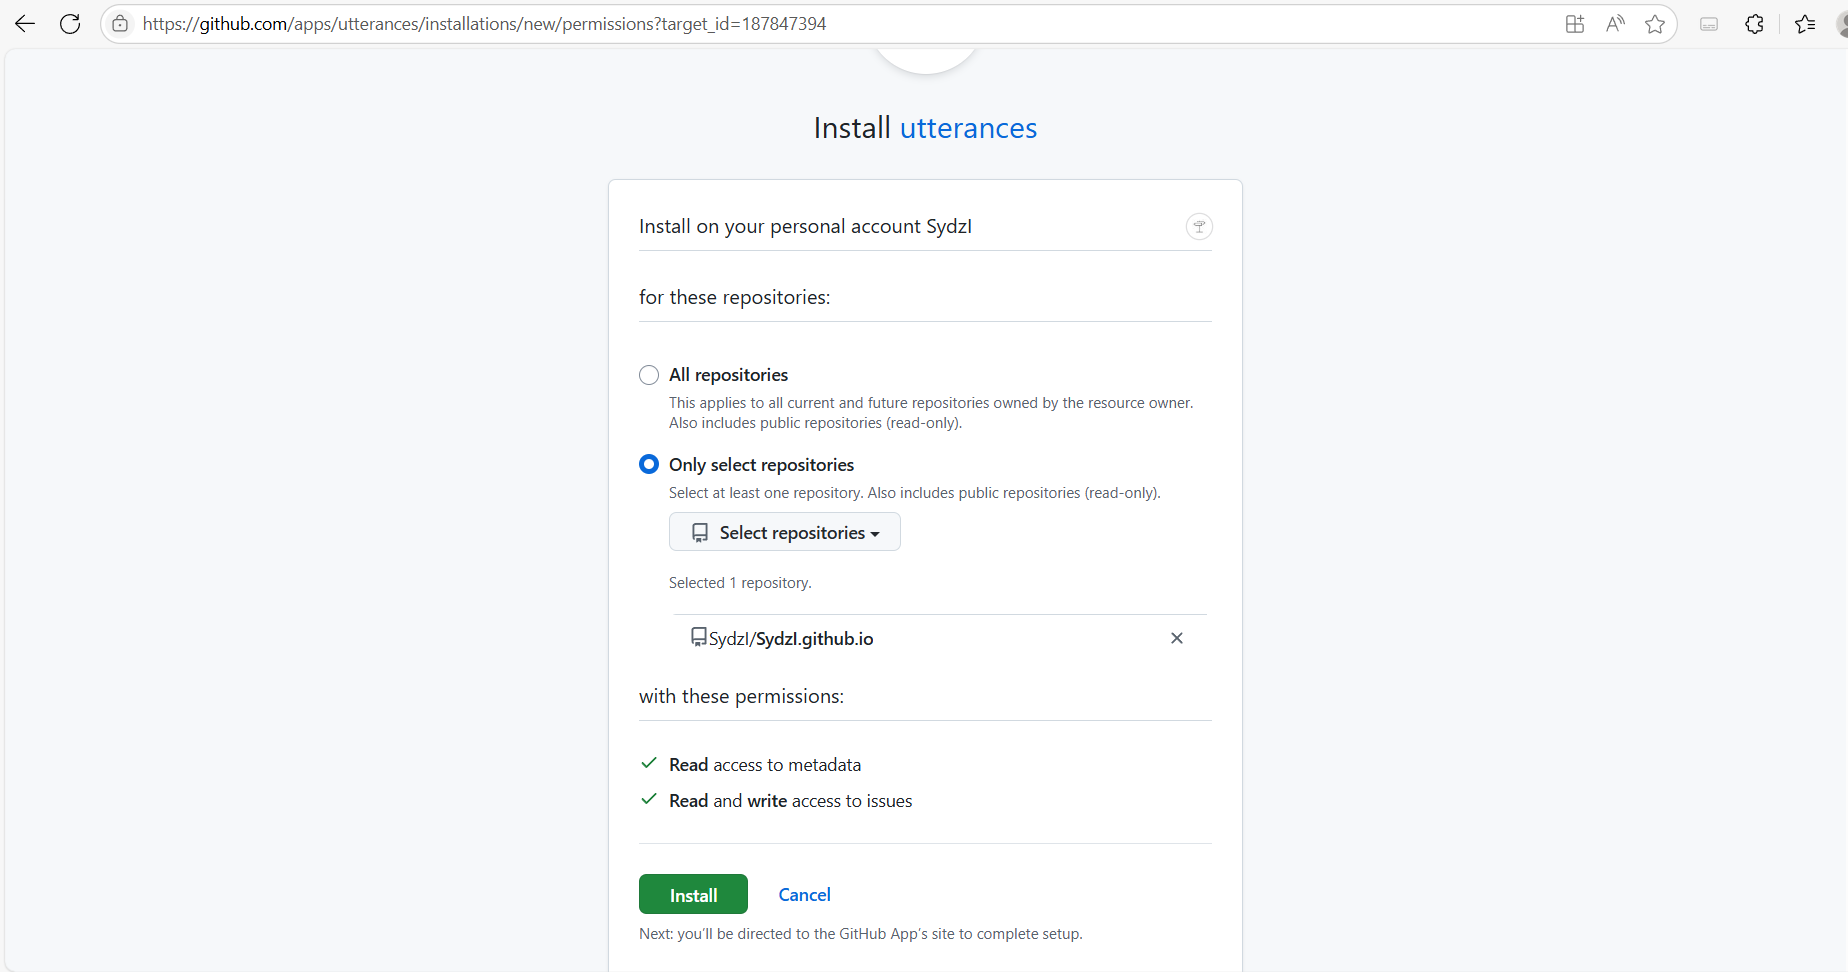
点击install就可以了
要注意的是,hexo s下是调试不了这个功能的(虽然不知道我为什么要在hexo s下调试这个功能),会报错,但是部署后是可以正常工作的
firestore统计访问人数
NexT8.23.0不支持Valine了,得重新选择数据统计系统。firestore是google的产品,因此需要科学上网。
参考大佬博客:https://weirenxue.github.io/2021/06/11/hexo_next_firestore_visitors/ 步骤很简洁完整了,但是个人实现的时候会有一些问题,接下来详细介绍相关步骤
首先,在next/config.yml里启用firestore:
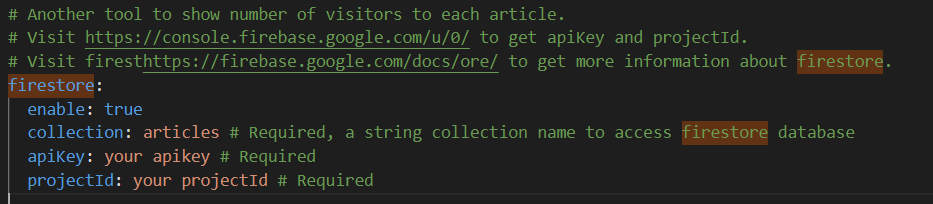
有两个空需要填写,apikey和projectId。不急,需要先有firestore的项目。接下来访问firebase:https://console.firebase.google.com/ (科学上网)
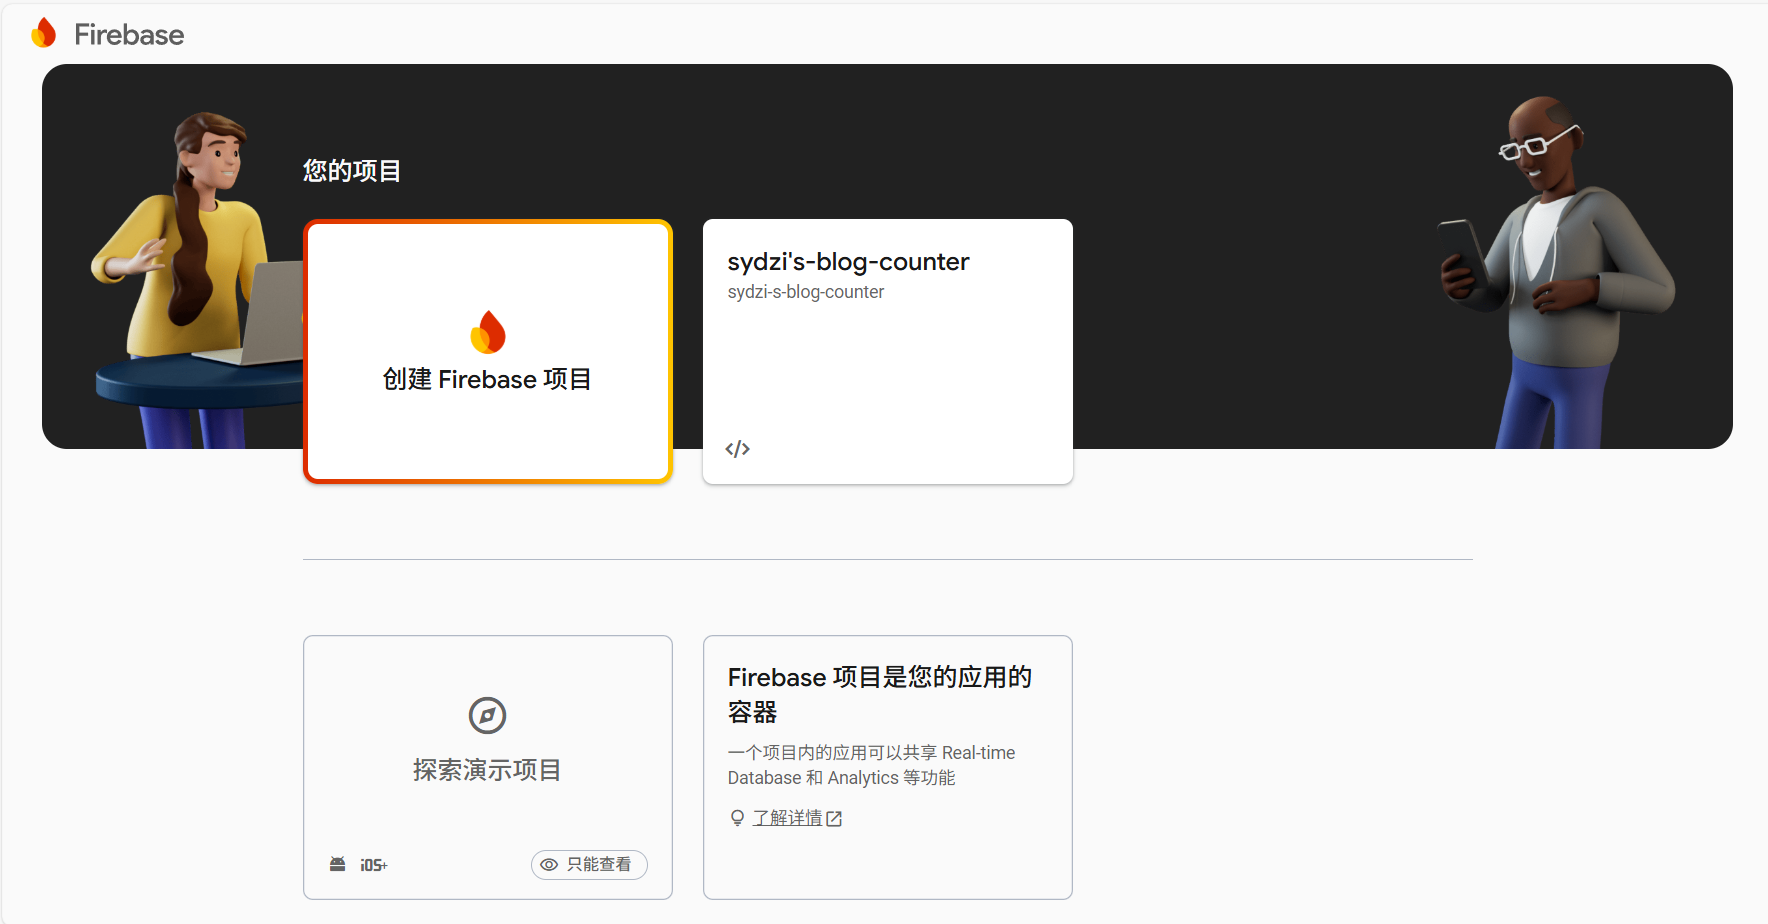
登录后点击“创建项目”
接下来按照引导走下去,开发者计划、AI辅助、google analytics根据个人需求选择,点击继续并稍等片刻就创建成功了。

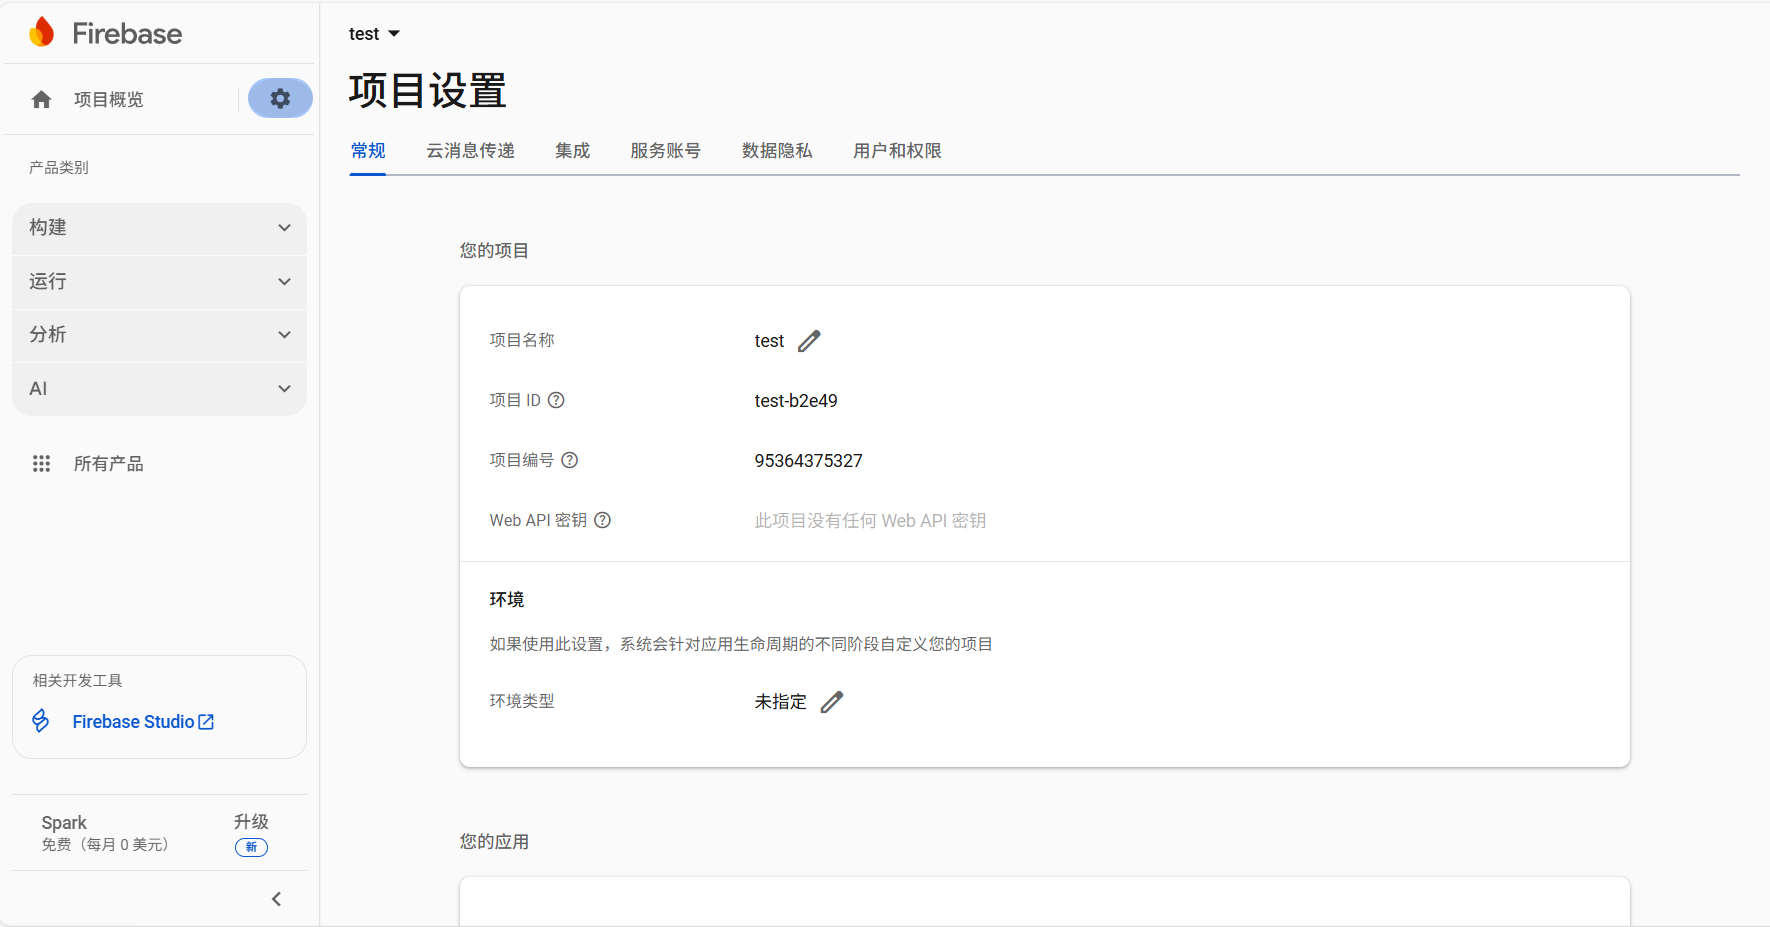
点击新项目,在左上角“项目概述”里点“项目设置”
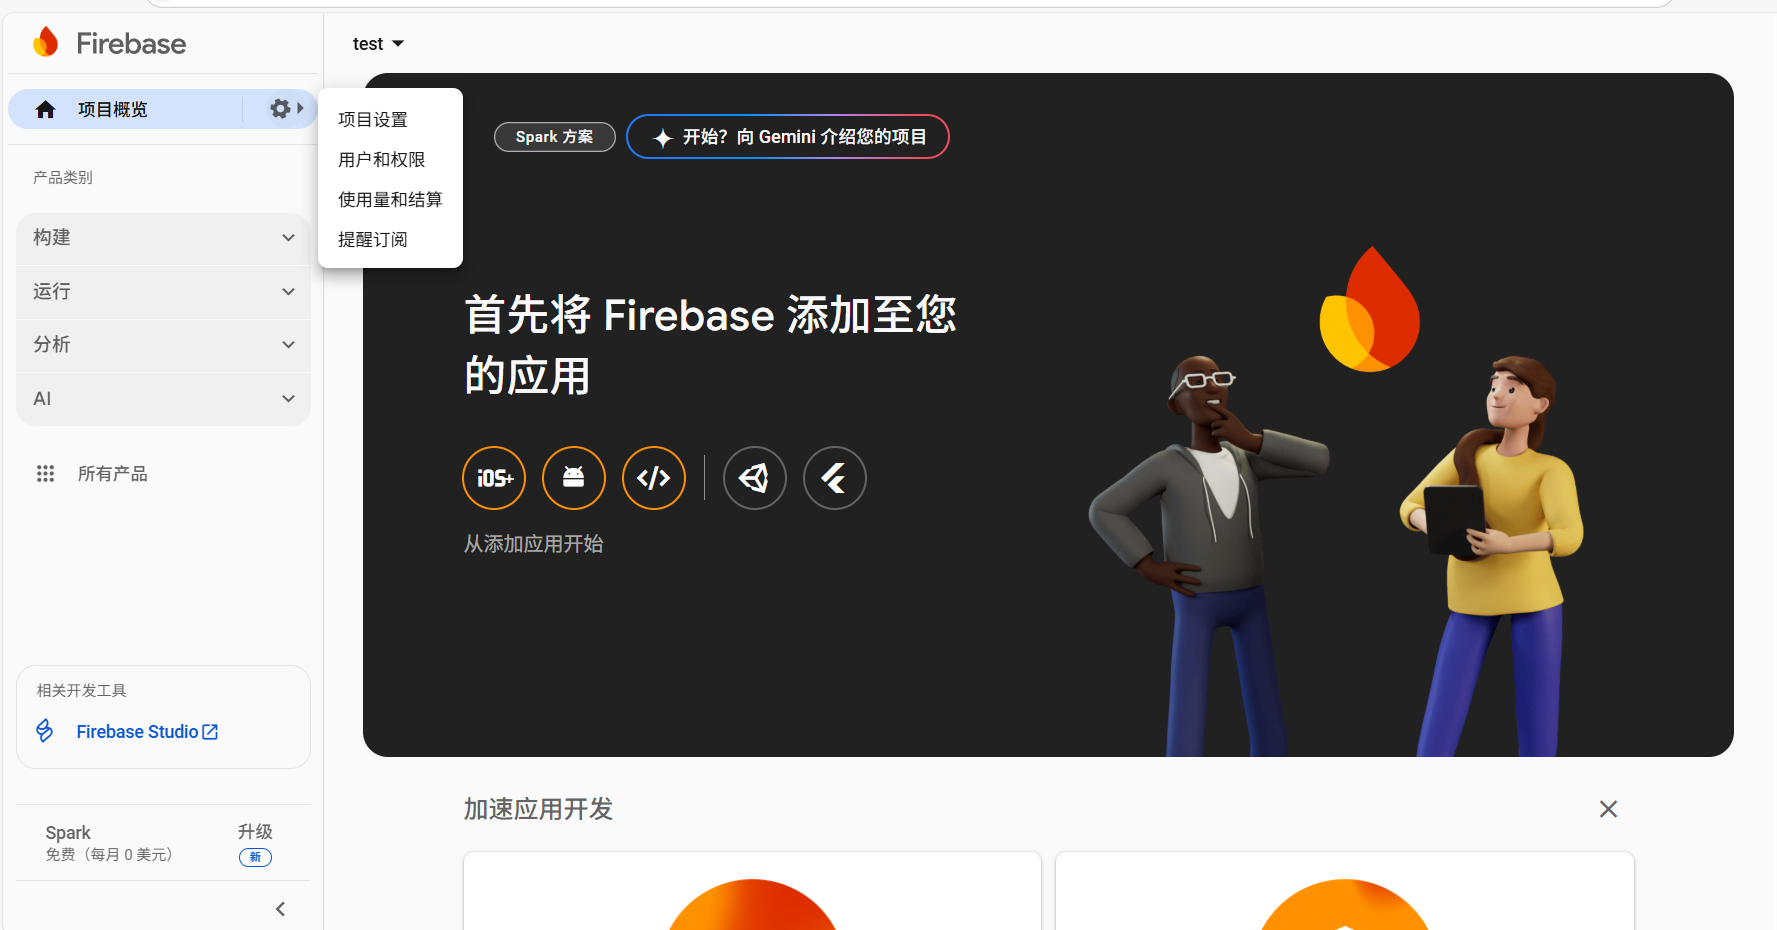
这时候可以看见项目ID等信息了,但是api还没有显示
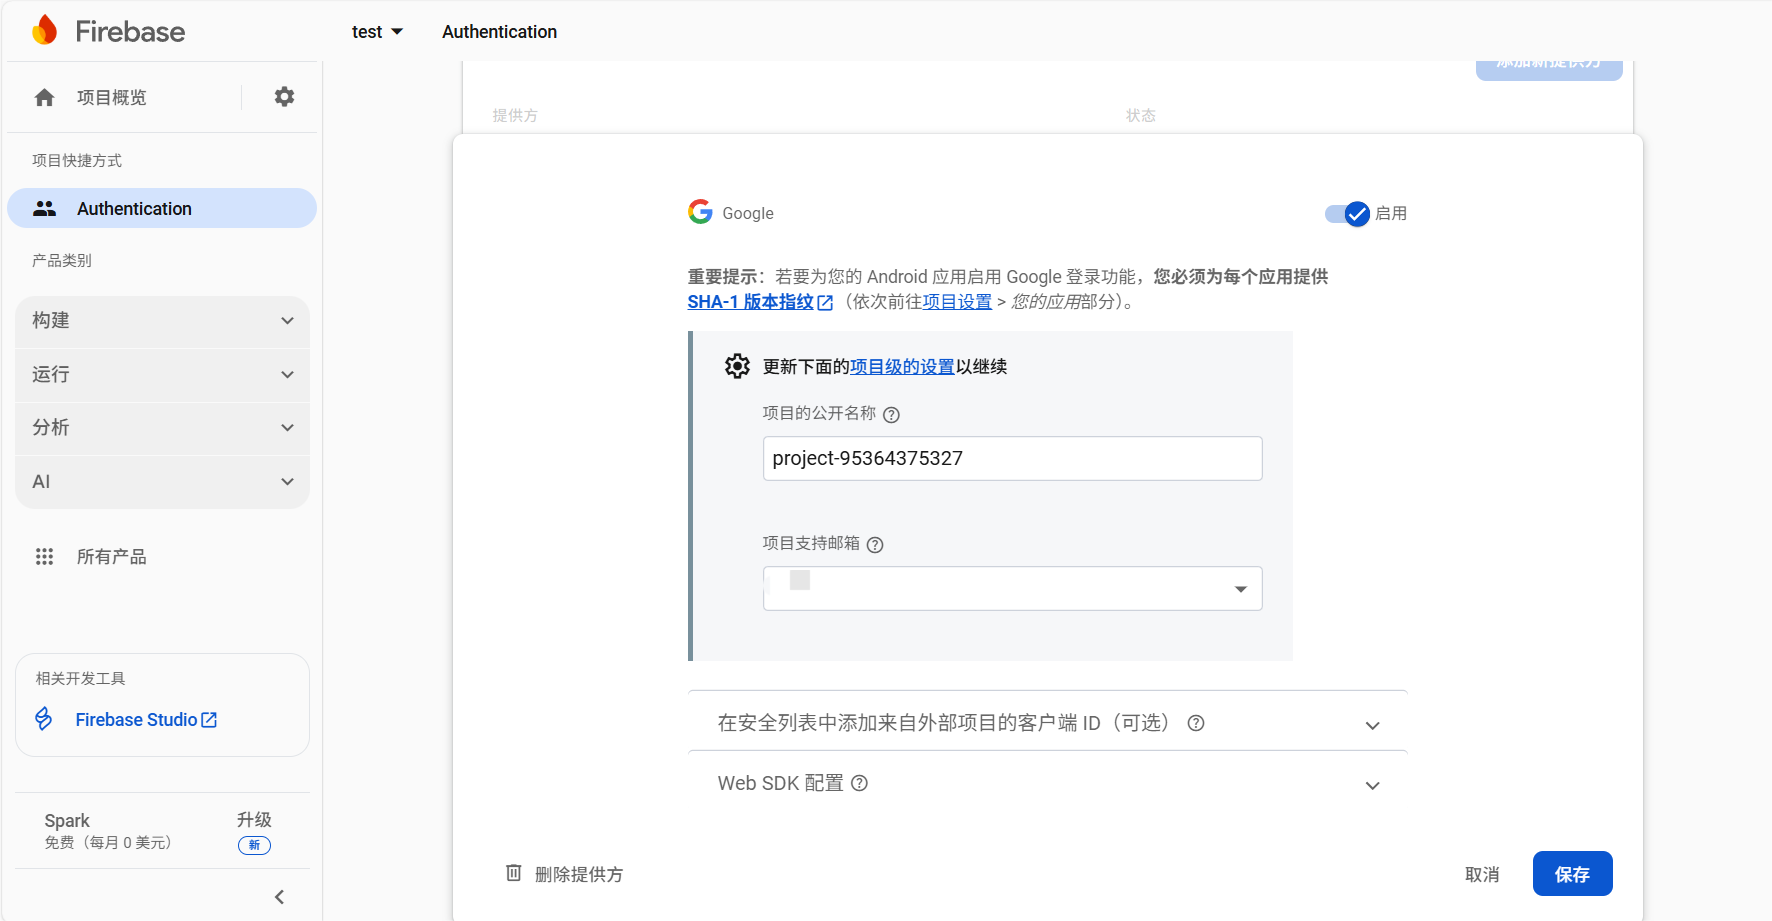
接下来在左侧边栏“构建”里找到“Authentication”,点击“开始”(哇,这个界面设置我还以为google不让手动设置只能用AI了,瞎按了半天才知道点”开始”)

接下来选择登陆方式登录即可。我选择谷歌,点击右上角启用,项目公开名称默认即可,项目支持邮箱选择个人谷歌邮箱
回到项目设置页面,可以看到api已经出现了
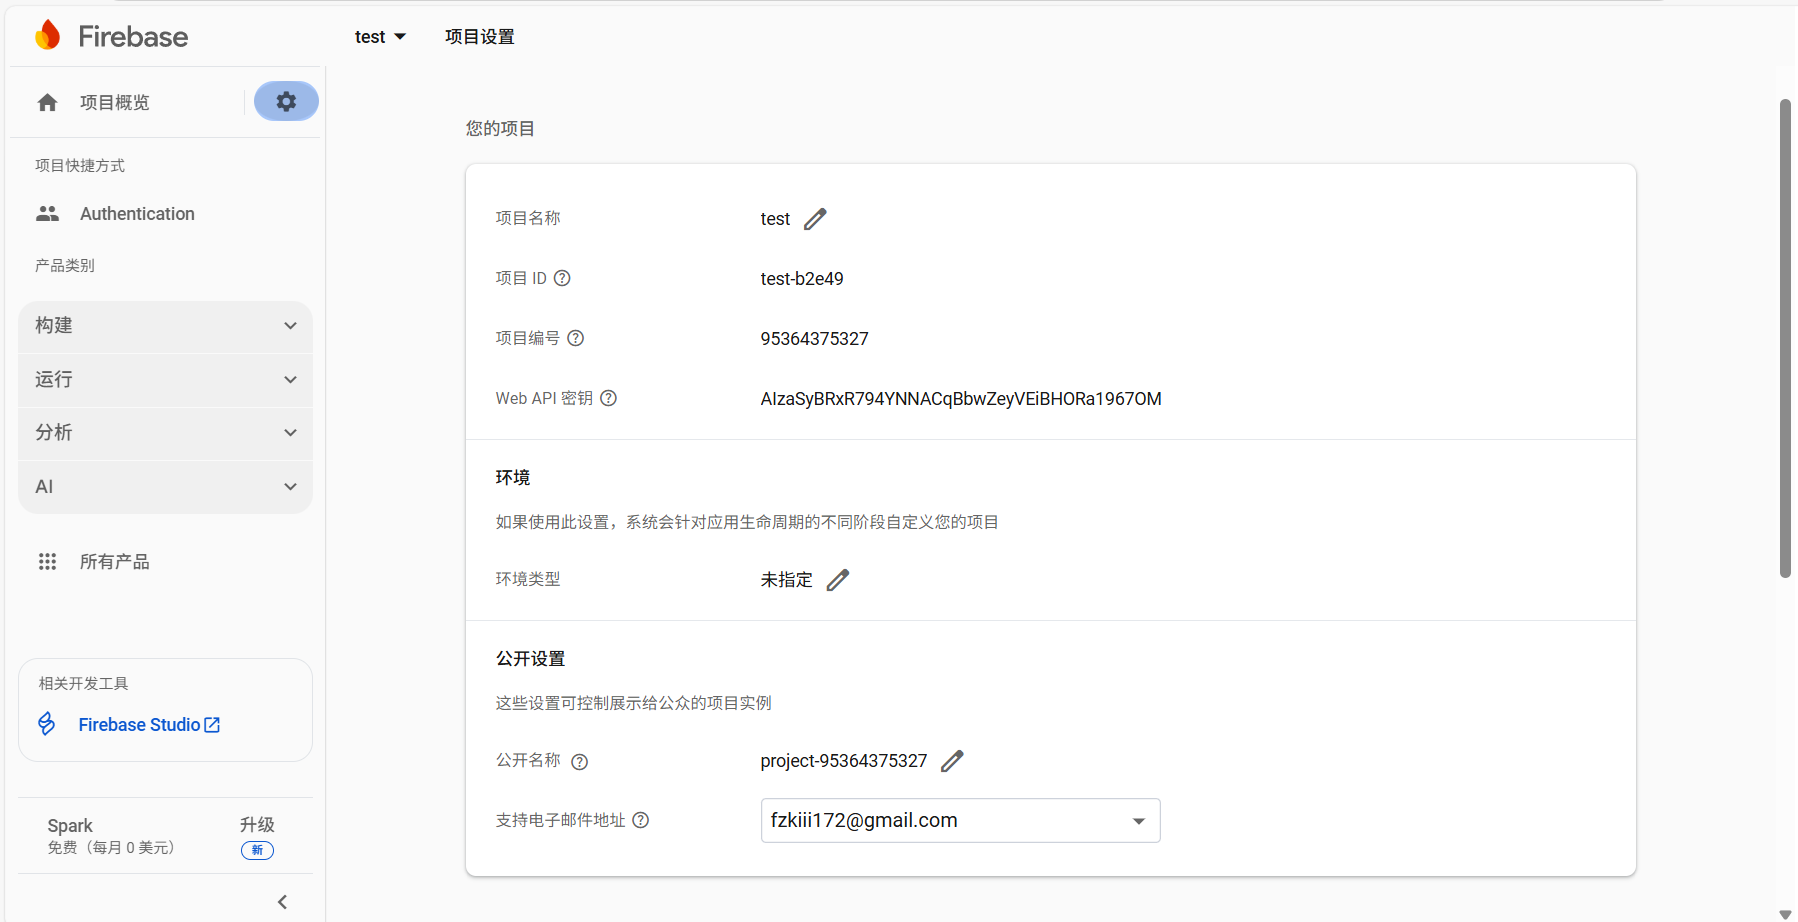
接下来就可以把next/config.yml里的projectId和apiKey填上了
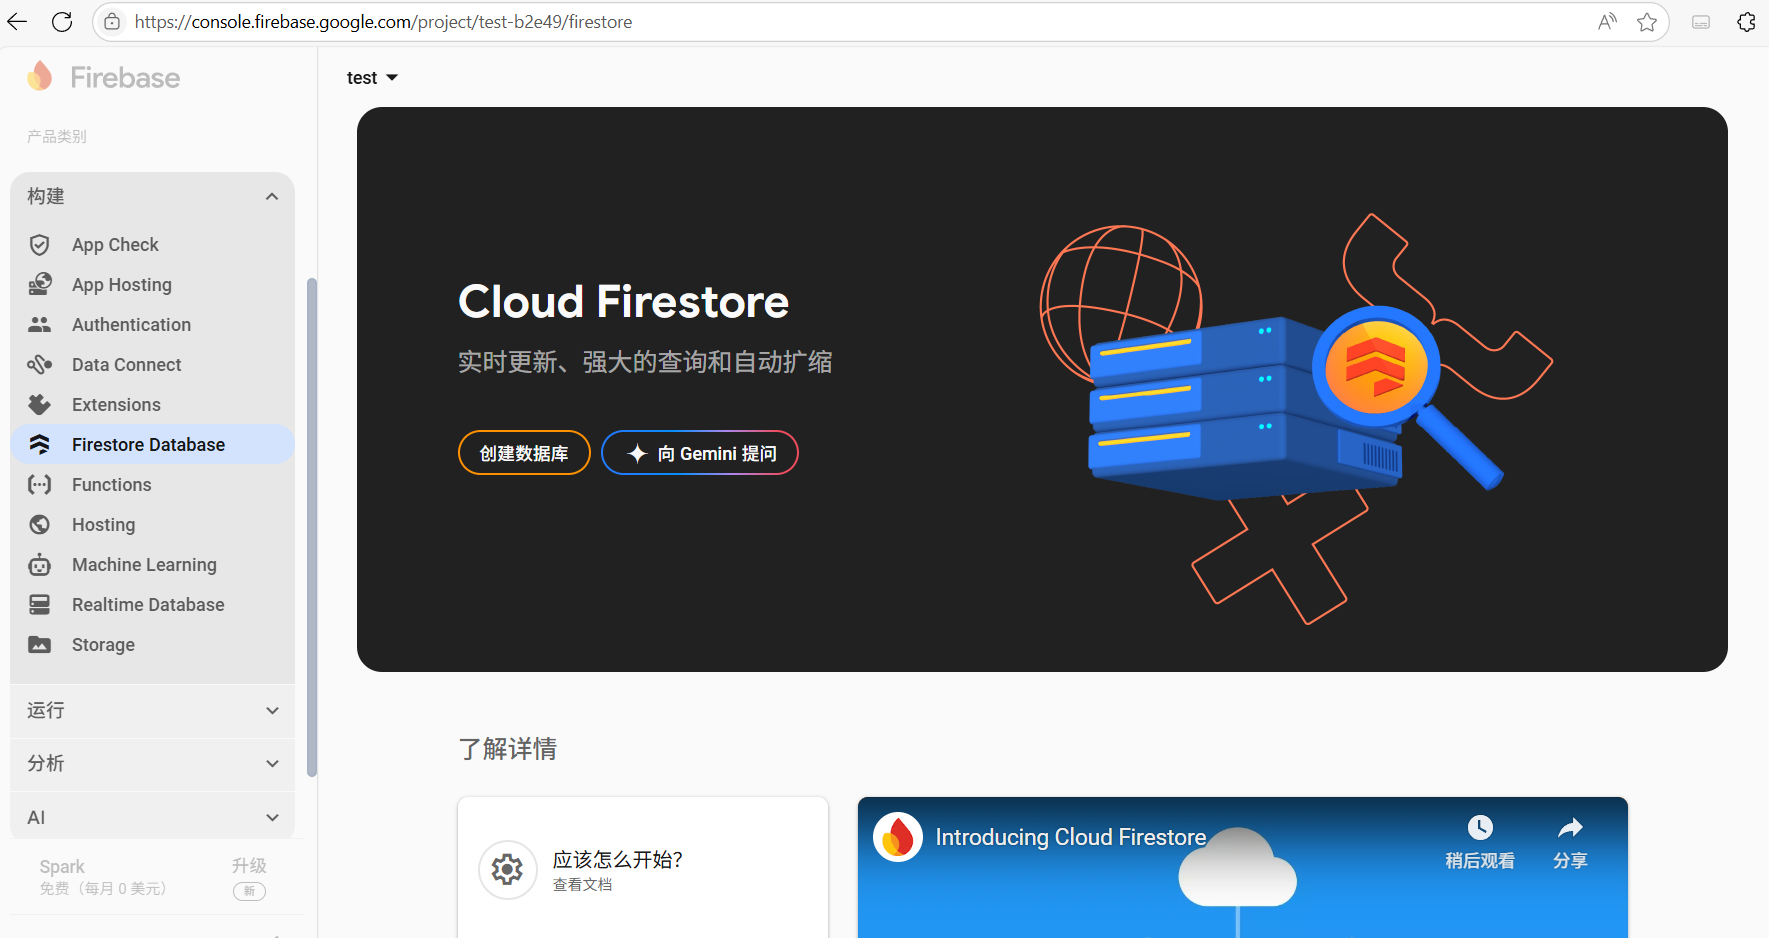
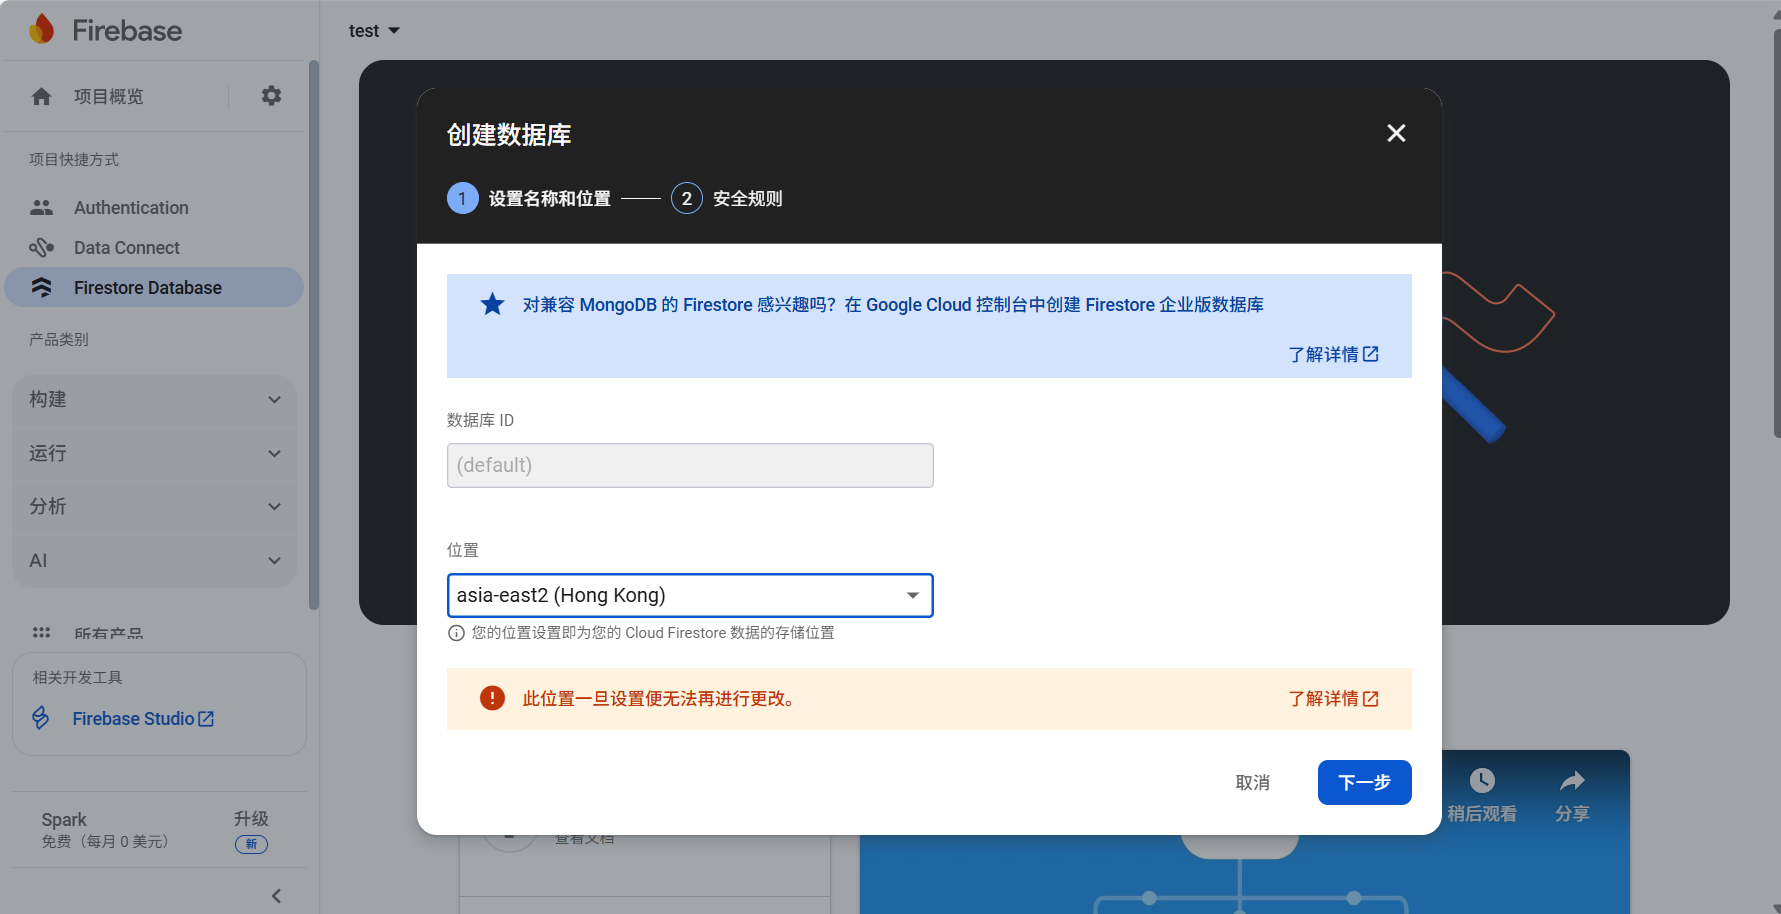
然后打开左侧边栏“构建”里的“Firestore Database”,点击“创建数据库”
接下来的页面,设置位置(数据库ID似乎不能改动),然后下一步
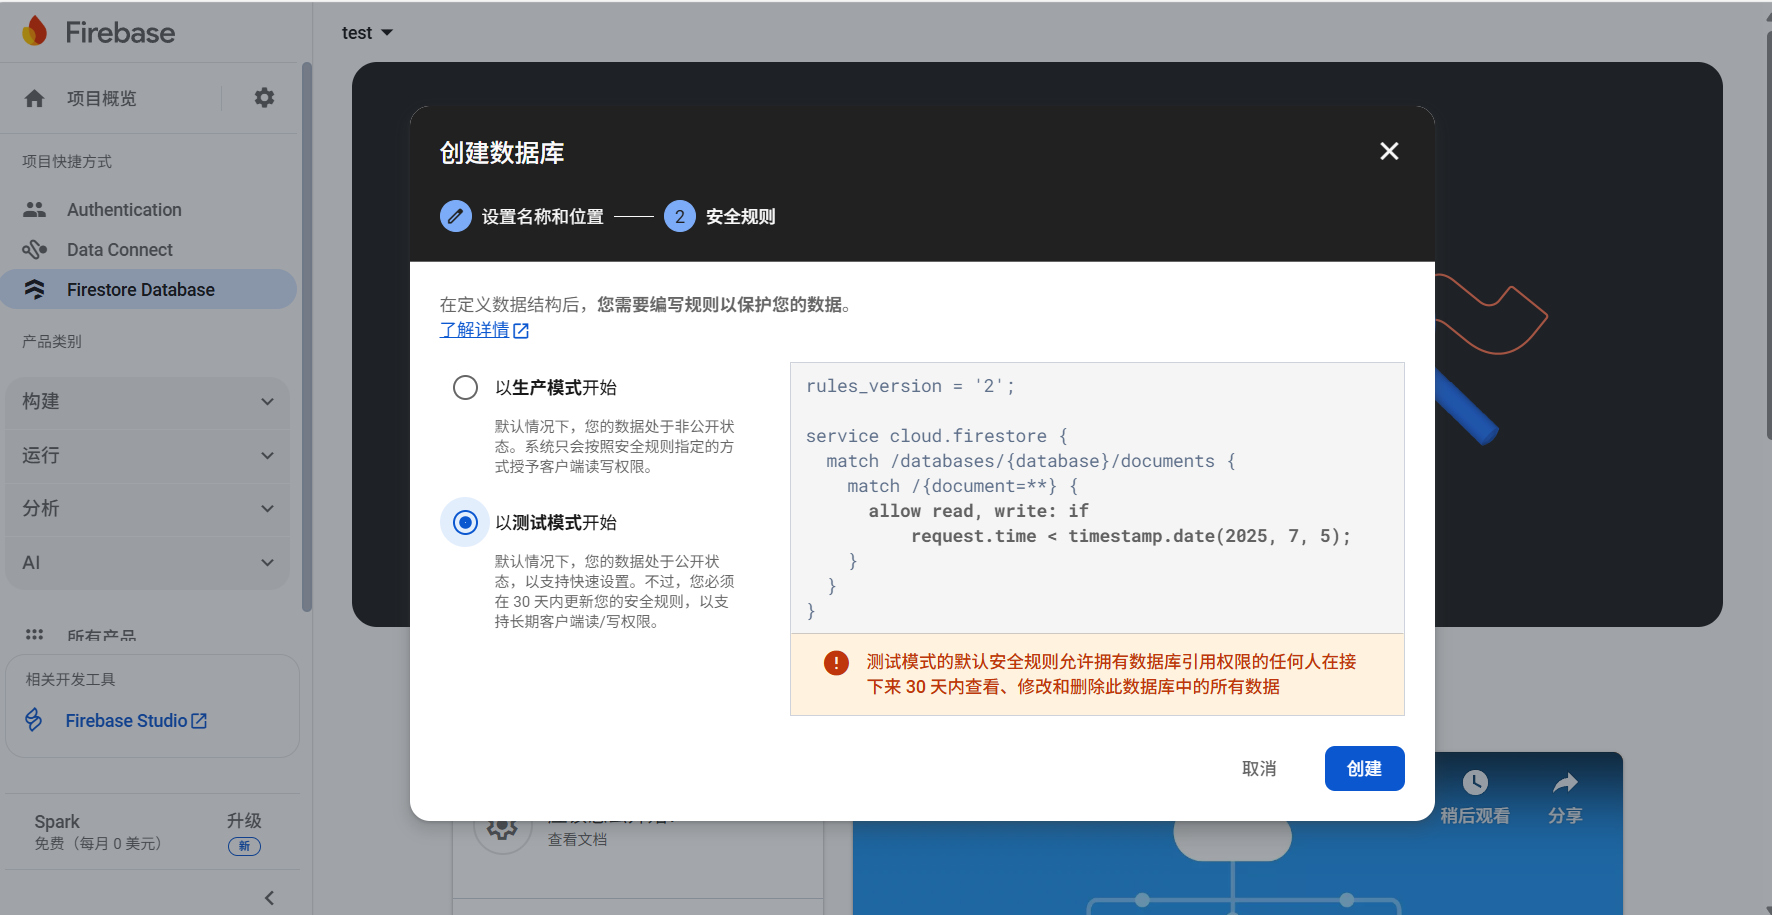
接下来选择测试模式,等待预配Cloud Firestore
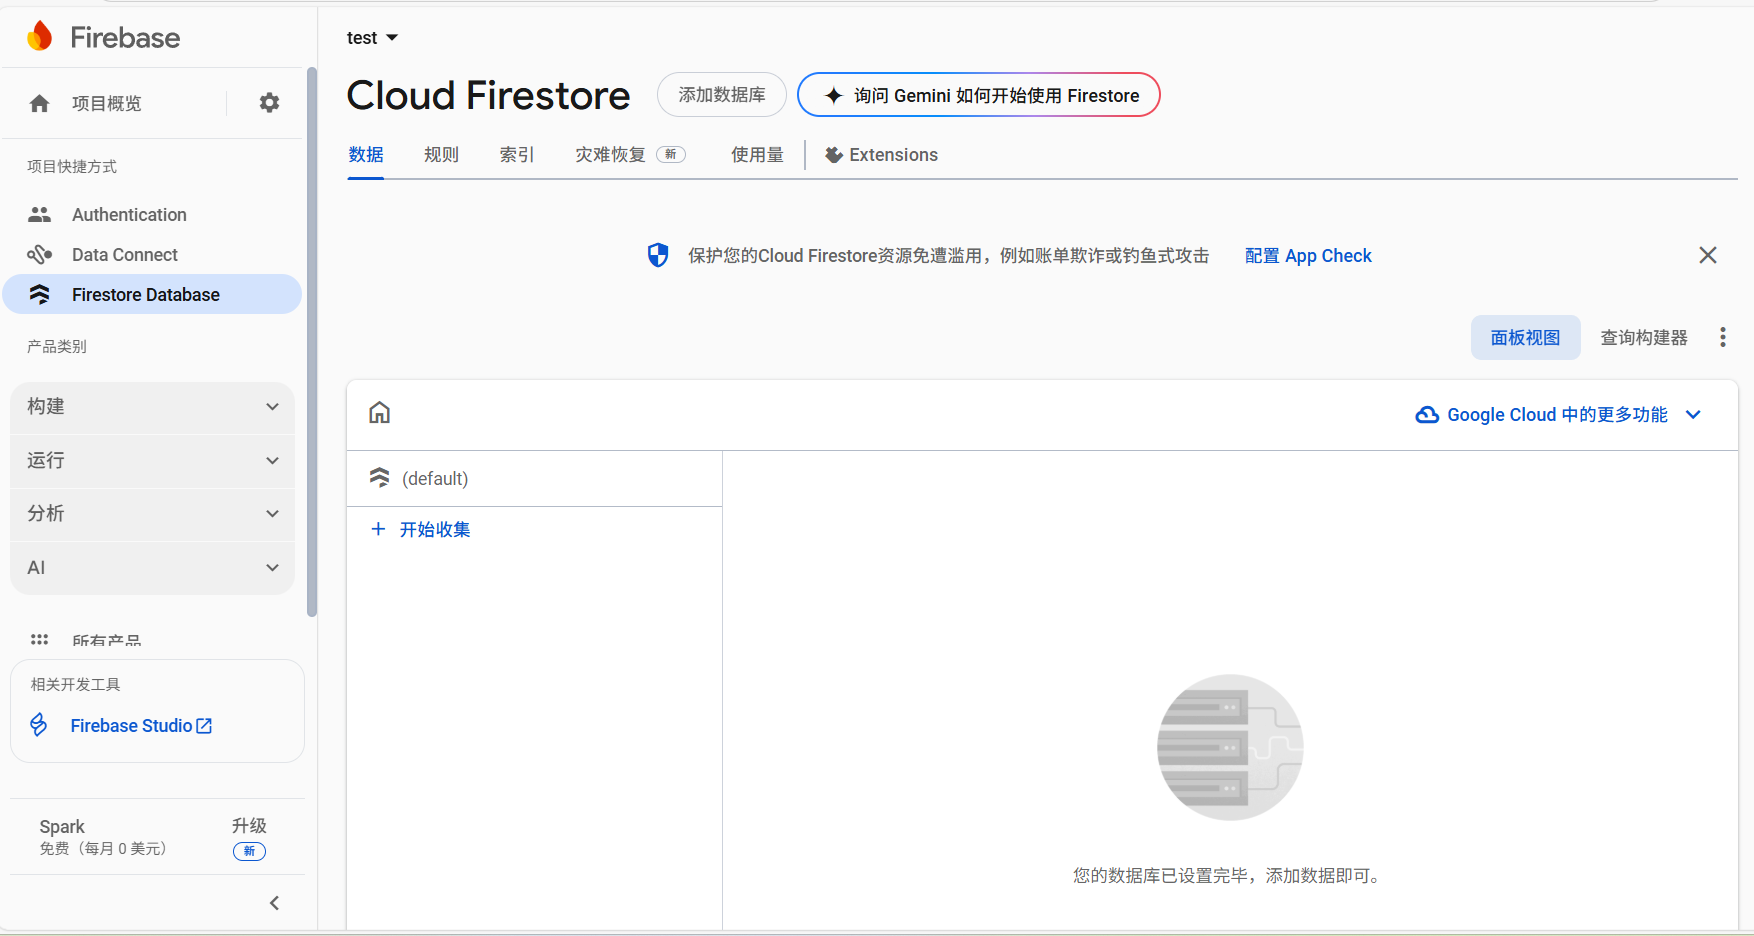
加载成功后长这样
接下来重新部署博客后就可以测试计数机制是否正常了。但是笔者在这一步折腾了很久,因为调试的时候发现:
1.数据库的信息在第一次启用计数机制后会自动生成,但是对这些信息进行改动后计数机制就失效了
2.即使在莫名其妙的情况下(可能是关闭firestore配置后再次开启的情况)重新初始化了数据库,计数1次之后再怎么访问(如刷新、关闭页面重新打开)也不会记录第2次
还有一些调试过程发现的问题,但是调试过程太乱了不好描述,所以下面直接指出问题并给出解决方案
首先,firestore的计数机制有点特别,它使用了localStorage来判断是否访问过文章,如果访问过文章,将不会出现第二次计数的情况(永远不会,除非重置localStorage)。这也解释了为什么改动数据信息后计数机制会失效:因为没有第二次计数,所以数据库信息不会再更新。因此需要对计数机制进行一些优化,优化方案来自DeepSeek,需要改动的配置为next/source/js/third-party/statistics/firestore.js
1
2
3
4
5
6
7
8
9
10
11
12
13
14
15
16
17
18
19
20
21
22
23
24
25
26
27
28
29
30
31
32
33
34
35
36
37
38
39
40
41
42
43
44
45
46
47
48
49
50
51
52
53
54
55
56
57
58
59
/* global CONFIG, firebase */
firebase.initializeApp({
apiKey : CONFIG.firestore.apiKey,
projectId: CONFIG.firestore.projectId
});
(function() {
const getCount = (doc, increaseCount) => {
// IncreaseCount will be false when not in article page
return doc.get().then(d => {
// Has no data, initialize count
let count = d.exists ? d.data().count : 0;
// If first view this article
if (increaseCount) {
// Increase count
count++;
doc.set({
count
});
}
return count;
});
};
const db = firebase.firestore();
const articles = db.collection(CONFIG.firestore.collection);
document.addEventListener('page:loaded', () => {
if (CONFIG.page.isPost) {
// Fix issue #118
// https://developer.mozilla.org/en-US/docs/Web/API/Node/textContent
const title = document.querySelector('.post-title').textContent.trim();
const doc = articles.doc(title);
let increaseCount = CONFIG.hostname === location.hostname;
if (sessionStorage.getItem(title)) {
increaseCount = false;
} else {
// Mark as visited in current session
sessionStorage.setItem(title, true);
}
getCount(doc, increaseCount).then(count => {
document.querySelector('.firestore-visitors-count').innerText = count;
}).catch(e => console.error('Error updating count:', e));
} else if (CONFIG.page.isHome) {
const promises = [...document.querySelectorAll('.post-title')].map(element => {
const title = element.textContent.trim();
const doc = articles.doc(title);
return getCount(doc);
});
Promise.all(promises).then(counts => {
const metas = document.querySelectorAll('.firestore-visitors-count');
counts.forEach((val, idx) => {
metas[idx].innerText = val;
});
}).catch(e => console.error('Error fetching counts:', e));
}
});
})();简单解释一下优化的主要思路:使用sessionStorage替换localStorage,计数机制变为会话级,即每次打开文章都会计数,而刷新不会计数
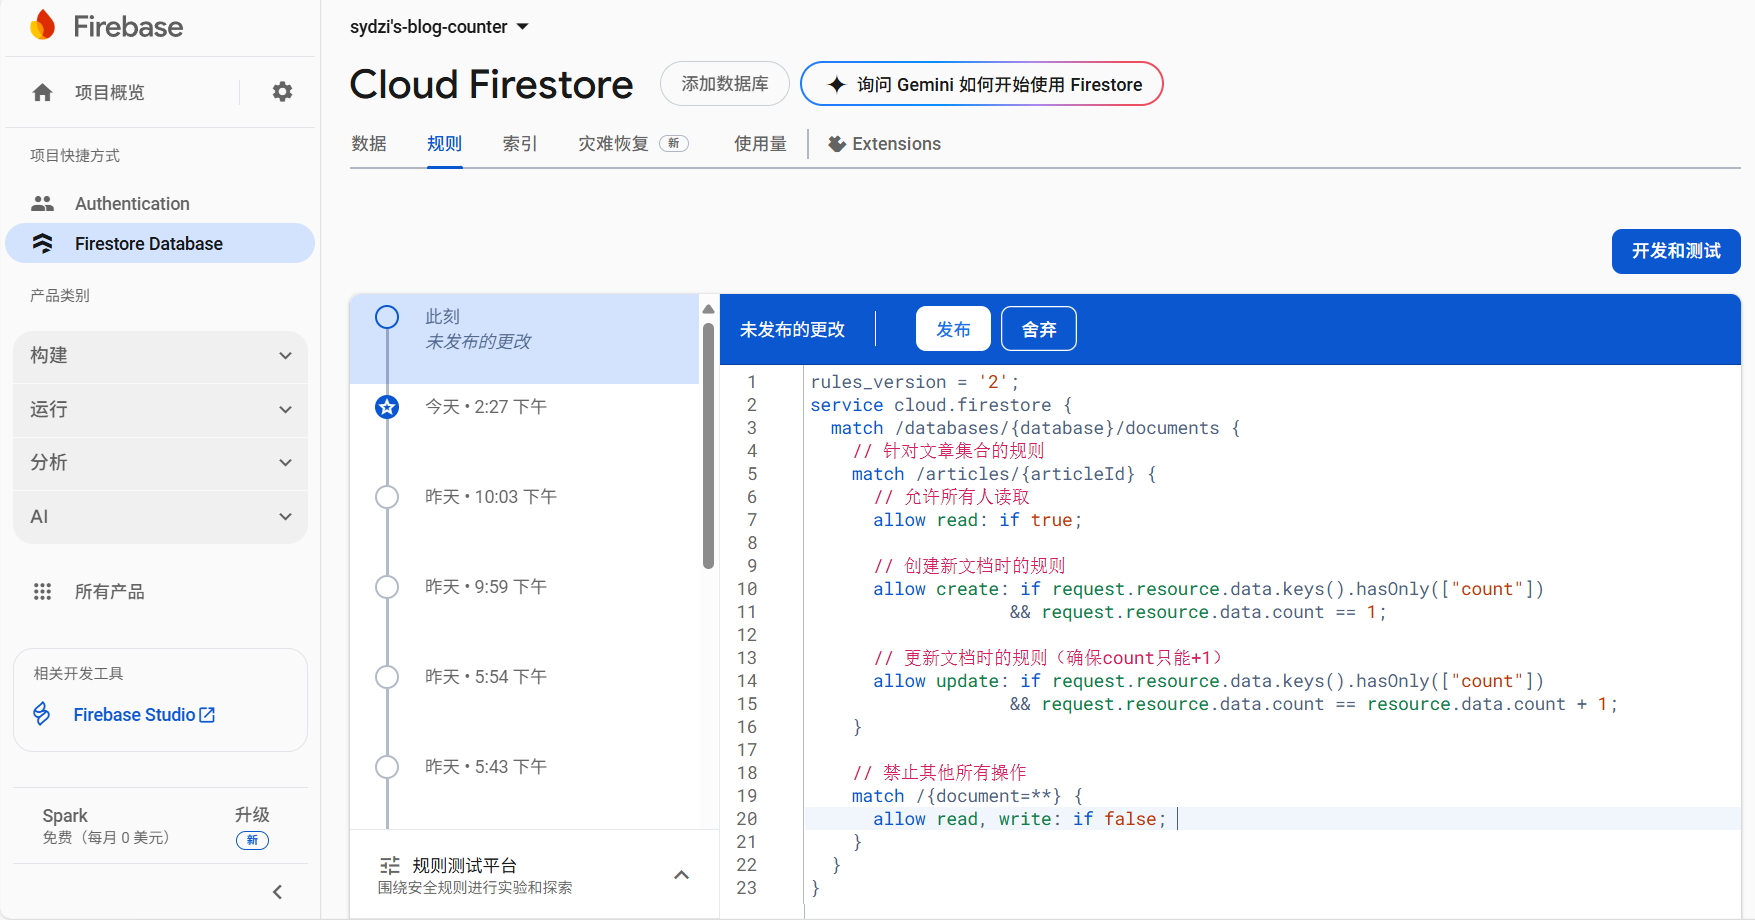
那么接下来就要设置一下数据库的规则了。大佬的安全规则好像有一些漏洞,下面是DeepSeek生成的安全规则:
1
2
3
4
5
6
7
8
9
10
11
12
13
14
15
16
17
18
19
20
21
22
23
rules_version = '2';
service cloud.firestore {
match /databases/{database}/documents {
// 针对文章集合的规则
match /articles/{articleId} {
// 允许所有人读取
allow read: if true;
// 创建新文档时的规则
allow create: if request.resource.data.keys().hasOnly(["count"])
&& request.resource.data.count == 1;
// 更新文档时的规则(确保count只能+1)
allow update: if request.resource.data.keys().hasOnly(["count"])
&& request.resource.data.count == resource.data.count + 1;
}
// 禁止其他所有操作
match /{document=**} {
allow read, write: if false;
}
}
}打开“Firestore Database”的“规则”,把规则粘贴进去,点击发布即可